Understanding MiniDV Tapes
What is a MiniDV Tape?
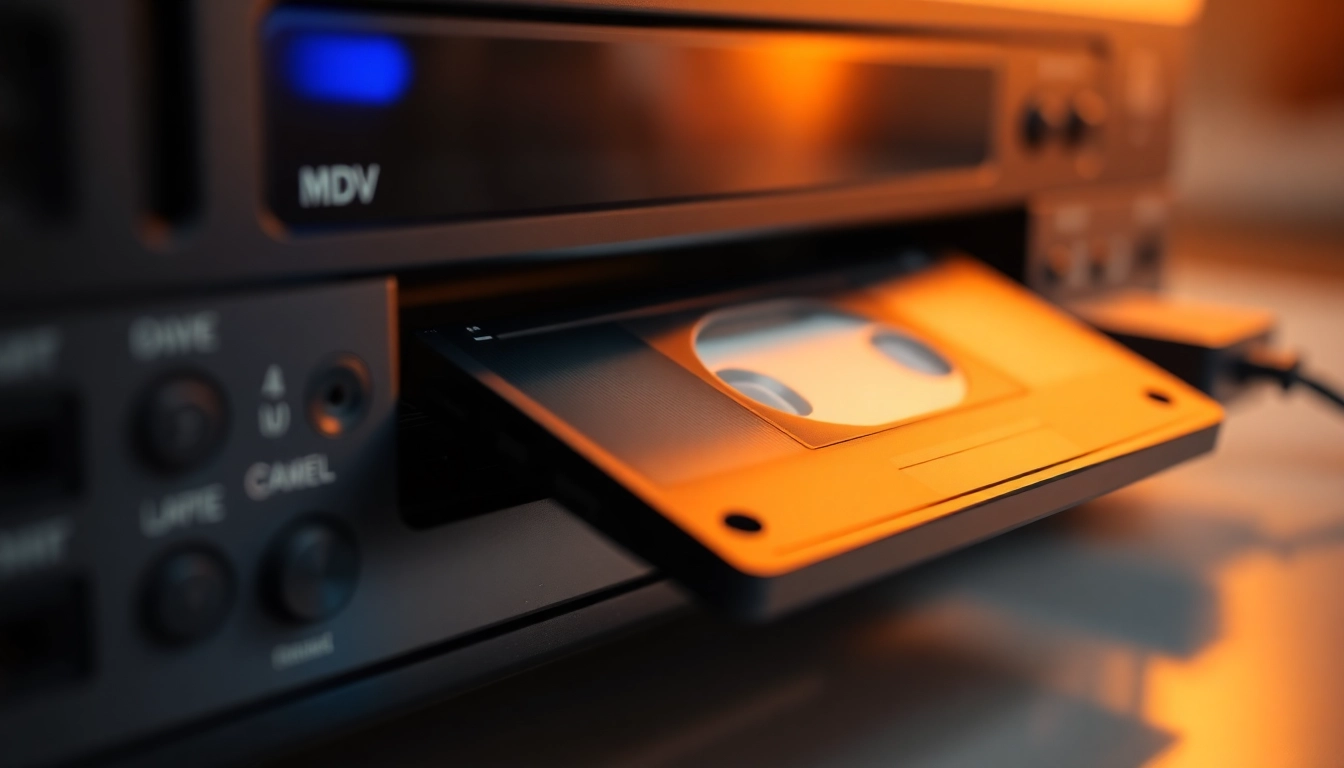
MiniDV tapes are small digital videotapes that were widely used in camcorders from the late 1990s through the early 2000s. Measuring just about 2 inches in width and 1.5 inches in height, these tapes were designed to store high-quality digital video. Each tape can hold approximately 60 to 90 minutes of video footage, depending on the recording mode used.
MiniDV represents a significant shift from the analog formats of the past, boasting advantages such as clearer audio and video quality, more effective compression, and easier editing. Each MiniDV tape is encoded in a digital format (DV), which allows seamless data transfer to a computer or editing system, making them a favorite among amateur and professional videographers alike. To learn more about the process of converting these tapes to digital, refer to Minidv to digital.
History and Use Cases of MiniDV
The MiniDV format was introduced in 1995 and quickly became a popular choice for users needing a portable and reliable video recording solution. It was favored in various fields, from home videos to professional filmmaking and event recording. One of the prominent use cases was in the early 2000s during the rise of digital filmmaking, where many aspiring filmmakers turned to MiniDV camcorders to create their first projects. It provided an affordable yet quality option to capture life’s moments without sacrificing too much in terms of fidelity.
With advancements in technology, MiniDV tapes became less common, overshadowed by newer formats such as HD and 4K recording solutions. Despite this decline, MiniDV has left a legacy, with many iconic films and projects originating from tapes captured using this format.
Common Challenges with MiniDV Tapes
Despite their popularity, MiniDV tapes can present several challenges:
- Quality Degradation: Over time, the magnetic tape can degrade, leading to reduced video quality.
- Physical Damage: Exposure to moisture, heat, or physical shocks can damage the tape and the video footage stored within.
- Obsolescence: As technology progresses, finding compatible playback devices becomes increasingly difficult.
- Data Loss: Tapes can be lost or become unreadable as they age, risking the loss of invaluable memories.
These challenges necessitate the conversion of MiniDV tapes to modern digital formats to ensure their preservation for future generations.
Why Convert MiniDV to Digital?
Benefits of Digital Formats
Converting MiniDV tapes to digital format offers several significant benefits:
- Enhanced Accessibility: Digital files can be easily stored, organized, and accessed on various devices. You can watch your videos on computers, smartphones, and smart TVs without the need for special equipment.
- Multiple Copies: Digital formats allow for easy duplication, meaning you can secure multiple backups of your important videos.
- Improved Sharing: Sharing videos with friends and family is much simpler in digital formats. You can upload files to social media or share them through email and cloud services in just a few clicks.
Preservation of Video Quality
Converting to a digital format helps maintain the original video quality of MiniDV recordings. Digital video files—especially high-definition formats—are less susceptible to degradation than analog formats. When you convert and store your videos using digital encoding (like MPEG-4 or AVI), you preserve the original content and quality.
Moreover, digital formats are easier to edit. You can cut, splice, and enhance video without loss of quality, making it an essential aspect of preserving your precious memories while enabling modifications for personal preferences.
Accessibility and Storage Options
Digital files come with flexibility in terms of storage. Unlike physical tapes, digital video can be stored on various platforms including external hard drives, USB drives, cloud storage solutions, and even video streaming services. This flexibility enhances organization, making it simple for users to categorize and access their video collections whenever needed.
Additionally, metadata tagging can be applied to digital files, making it easier to search and retrieve specific recordings based on events, dates, or other relevant details. This simple organizational tool can save time and effort while digging through archives to find cherished memories.
Choosing the Right Conversion Method
DIY MiniDV to Digital Conversion
One of the most cost-effective ways to convert MiniDV tapes to digital is to do it yourself (DIY). This method can be appealing for those looking to save money while maintaining control over the quality of the conversion process. Here’s how you can do it:
- Equipment Required: To convert MiniDV, you will need a MiniDV camcorder or player, a computer with a firewire (IEEE 1394) port or USB capture device, and video editing software.
- Setup: Connect the camcorder to your computer via firewire or USB. Use video editing software capable of capturing footage from your device.
- Capture Process: Start playback on the camcorder and initiate capture in your software. This transfers the video and audio from the tape to your computer in real time.
- Editing: After capturing, you can edit the footage directly within your software before finalizing the product.
While DIY methods can deliver satisfactory results, they do require a little technical knowledge and patience to ensure proper execution.
Professional Services vs. Home Solutions
For those who prefer not to tackle the conversion themselves, many professional services specialize in MiniDV to digital conversion. Here are a few factors to consider when weighing your options:
- Quality Assurance: Professionals use high-end equipment and experienced personnel, often achieving better results than DIY methods.
- Time Efficiency: Outsourcing this task frees up your time, allowing you to focus on other priorities while experts handle the conversion.
- Cost Consideration: While professional services are typically more expensive than DIY, the investment can be worthwhile for the peace of mind and assurance of quality.
Research various service providers and read reviews to ensure a high standard of service. Many businesses also offer guarantees that help protect your valuable footage.
Factors to Consider When Selecting a Method
Choosing the right method for converting MiniDV to digital depends on several factors:
- Technical Skills: Assess your comfort level with technology and video editing. If you are tech-savvy, a DIY approach might be suitable; otherwise, professional help might be the way to go.
- Budget: Determine how much you are willing to spend. DIY requires an upfront investment in equipment but can save you money long term, while professionals come with service fees.
- Volume of Tapes: If you have many tapes to convert, professional services might be more time-efficient, while a few tapes can be manageable at home.
By balancing your skills, budget, and volume of tapes, you can select the most suitable conversion method for your needs.
Step-by-Step Guide to Converting MiniDV to Digital
Preparing the MiniDV Tape for Conversion
Before diving into the conversion process, it’s crucial to prepare your MiniDV tapes properly:
- Inspection: Check each tape for physical damage, such as cracks or wear. If you notice any issues, consider contacting a professional service.
- Clean the Tapes: Use a soft cloth to clean the exterior of the tapes to avoid transferring dirt to your equipment during playback.
- Test Playback: It’s a good idea to play the tape through your camcorder to ensure the tape runs smoothly and is in good condition before converting.
Preparation plays a vital role in the overall success of your conversion process, ensuring that potential issues are addressed before they arise.
Using Conversion Equipment Effectively
When you are ready to convert the tapes, it’s essential to have the right equipment and use it effectively:
- Setup: Connect your MiniDV camcorder or player to your computer using the appropriate cables, ensuring tight connections.
- Software Configuration: Open your video capture software and select the appropriate input source (your camcorder). Adjust any settings to optimize quality.
- Capture Process: Press play on your camcorder and hit record in the software. Monitor the process to ensure everything is working correctly.
- Finalizing: Once the tape has finished playing, save the file in your desired format and location on your computer.
Make sure to keep an eye on the quality of the capture; if you notice any glitches, consider re-capturing sections of video as needed.
Post-Conversion Editing and Organizing
After successfully converting your MiniDV tapes to digital, you might wish to edit and organize your footage:
- Editing: Utilize video editing software to trim unwanted segments, add music, or include text overlays. This enhances the storytelling aspect of your videos.
- File Naming: Develop a consistent naming scheme for your files to make locating specific videos easier in the future.
- Folder Structure: Create organized folders based on themes, dates, or events to streamline video access later on.
- Backup: Don’t forget to create backups on external drives or cloud services to protect your data from accidental loss.
A well-organized digital library can save hours of searching and provides a more enjoyable experience when revisiting your cherished memories.
Maintaining Your Digital Files
Best Practices for Digital File Storage
Once your MiniDV tapes have been converted, maintaining your digital files is crucial for long-term preservation:
- Regular Backups: Implement a backup strategy where you routinely back up your digital files to multiple locations, such as external drives and cloud storage.
- Cloud Storage: Consider using cloud-based services to store copies of essential files, as they provide additional security and accessibility across devices.
- File Format Considerations: Select widely-used file formats for long-term preservation. Formats like MP4 or MOV are recommended for their compatibility and quality retention.
Adhering to best practices for file storage not only protects your memories but also ensures you can enjoy them for years to come.
Preventing Data Loss and Corruption
Data loss and corruption can occur due to various reasons such as accidental deletion, hardware failure, or malware attacks. Implement the following strategies to mitigate these risks:
- Redundant Backups: Create at least three copies of your important files in separate locations. This way, if one copy fails, others will still be available.
- File Integrity Checks: Use tools to regularly check your files for any signs of corruption. This proactive approach allows you to address issues immediately.
- Security Measures: Keep your devices and software updated to ensure that you have the latest security measures in place to protect against malware and attacks.
By putting measures in place to counter potential risks, you can greatly reduce the likelihood of data loss and enjoy peace of mind regarding your digital collection.
Future-Proofing Your Video Collection
Technological advancements occur rapidly, making it crucial to future-proof your digital video collection:
- Keep Up with Trends: Stay informed about emerging technologies, file formats, and storage solutions to ensure your files remain accessible in the future.
- Convert to Multiple Formats: If necessary, consider keeping multiple formats of the same video. This can help in case some formats fall out of favor.
- Upgrade Storage Solutions: As you gather more video files, periodically review your storage solutions and consider upgrading to ensure sufficient space and performance.
Being proactive about future-proofing your collection can ensure that your videos remain accessible and intact throughout the years.


Leave a Reply